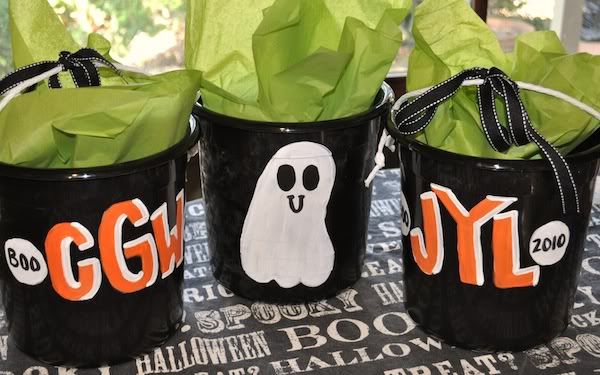
My crafty friend, Amanda, always comes up with the cutest DIY projects! This particular one even looks easy enough for me. I'm craft challenged!
Supplies: a plastic bucket, acrylic paint (orange, white & black), paint brushes, polyurethane spray along with tissue, ribbon, a gift tag and candy.
Directions:
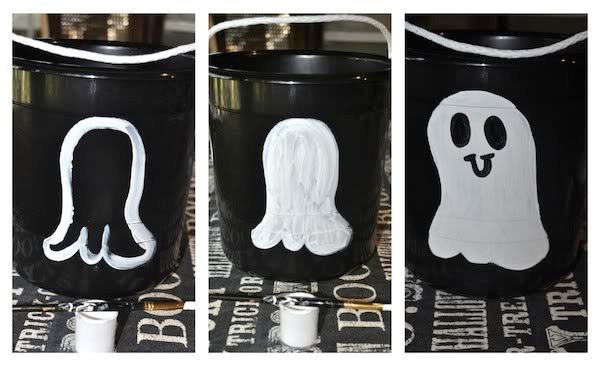
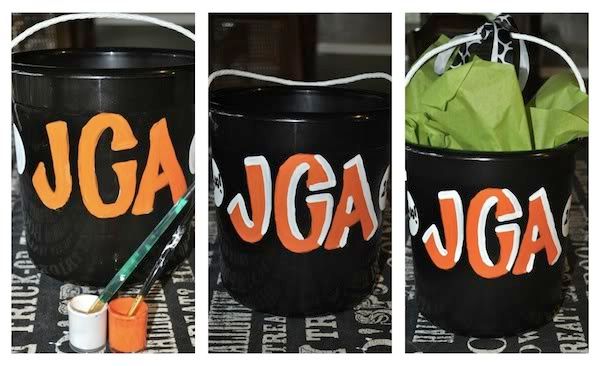
First, spray the bucket with polyurethane spray. This will help the paint adhere. Next, paint a white ghost on the bucket. Then, using white paint, paint the monogram, name or phrase you wish to use. Also, paint the large white dots on the side; 2 coats.
Using the black paint, add your ghost face, "Boo" and "2010" to your dots. Then, apply 2 coats of orange paint to the monogram, name or phrase. Next, add letter "shadowing" to your lettering using white paint. Finish by spraying the bucket with polyurethane spray once again.
Now all you need to do is include a gift sticker, fill tissue paper with candy and tie ribbon on the handle for a BOOtacular Halloween treat!
This is such a cute and easy Halloween bucket you can make as a gift or even for your child's treat bucket! Thank you Amanda for sharing!
**Amanda found this particular bucket at HEB in the candy aisle.**


5 comments:
So cute!! I'll have to keep this in mind for next year.
love this! Makes me want to throw a Halloween party or playdate. Maybe next year! I want to see the pics from your playgroup!!
Such a cute tutorial! I am a sucker for anything "monogrammed".
If you are looking for any last minute Halloween inspiration, I just posted yesterday my Pumpkin Carving party!
frillsandfrolic.blogspot.com
Christi, this is awesome. I could totally make these with my kids. Thanks again for sharing great ideas.
http://simplyiced.blogspot.com/
This is so nice.. Glad to see this at landmark group careers for students currently who are living in UAE..
Post a Comment